Building ESP8266 Weather station with BME280 (part 1)
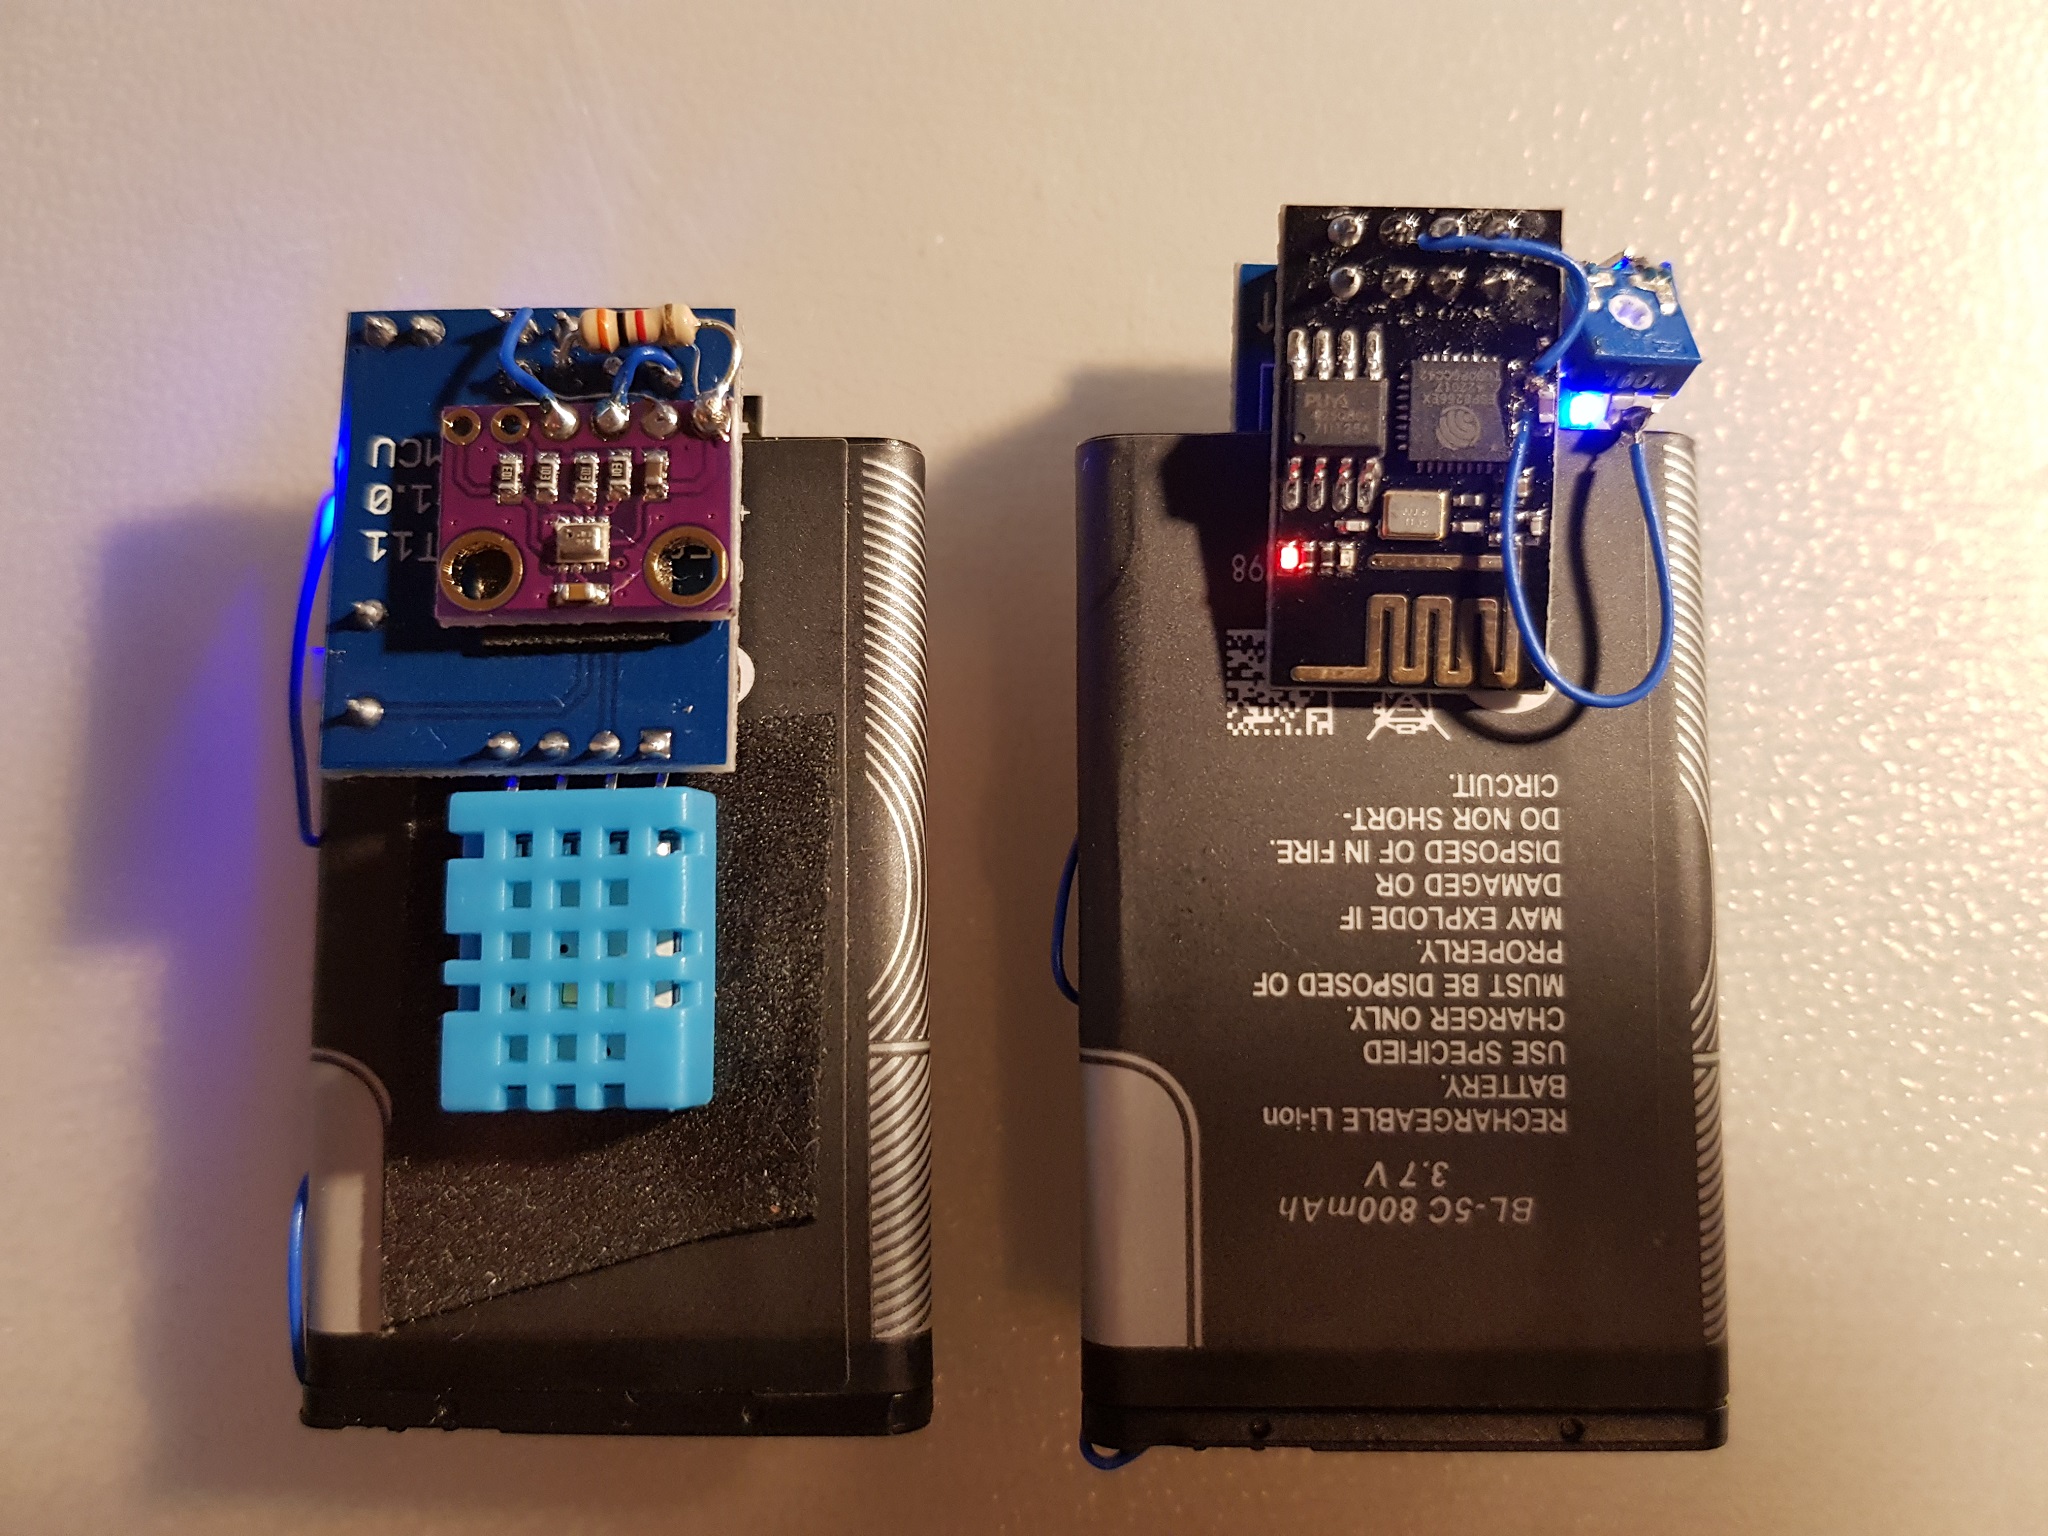
Ever since I started playing around with ESP modules I wanted to measure weather conditions in multiple location at home, friends, etc. The best way to achieve that would be to build a station that gathers various environment parameters and publishes them somewhere. That is what I've done. The very first prototype was done using ESP-1 module, DHT-11 humidity sensor and BMP280 breakout board. The station publishes gathered data to a MQTT broker from where it can be further gathered and analysed.
Basically the operation of the station is as follows: the station will try to connect to configured multiple Wifi networks and if no such were found, will try open networks. Then it will connect to MQTT broker and announce telemetry data until 30 seconds elapses. In that case it will go to deep sleep for 30 minutes and the process starts over.
During development and playing around, three variants were born: OLED, E-Paper and Headless.
The source code for the station is here.
Features
- mDNS
- OTA
- Connect to free wifi or one of configured networks
- MQTT Pub/Sub
- Report temperature
- Report relative humidity
- Report air pressure
- Report battery voltage
- Monitor and display several other station telemetry
- Headless
- OLED display
- E-Paper display
- Configure Wifi networks via MQTT
- Configure station name via MQTT
- Configure station names to be monitored via MQTT
- Persistent telemetry MQTT messages
General operation
Each station variant tries to connect to either open wifi or one of configured wifi networks giving priority to configured networks. After that it tries to connect to a configured MQTT broker. Once initial telemetry data is available, starts to publish telemetry data to MQTT broker every 1s. After 30s of bootup will go to deep sleep. After 30 minutes will wake up and repeat the cycle. OLED/E-Paper variants also display gathered telemetry data. Calculated power demand is around 1mAh and can be lowered by reducing time spend awaken and removing LEDs from ESP module. Also higher resistor value for voltage divider could be used. Configuration of the station is done via MQTT messages. E.g. to set a name for device "18:FE:34:A7:05:1A" one should publish a string e.g. "Balkony" to "18:FE:34:A7:05:1A/name". E-Paper variant is a little bit different. You can specify up to three other station names to display by separating names with a space, e.g. "paper room Balkony closet" to "18:FE:34:A7:05:1A/name".
Headless
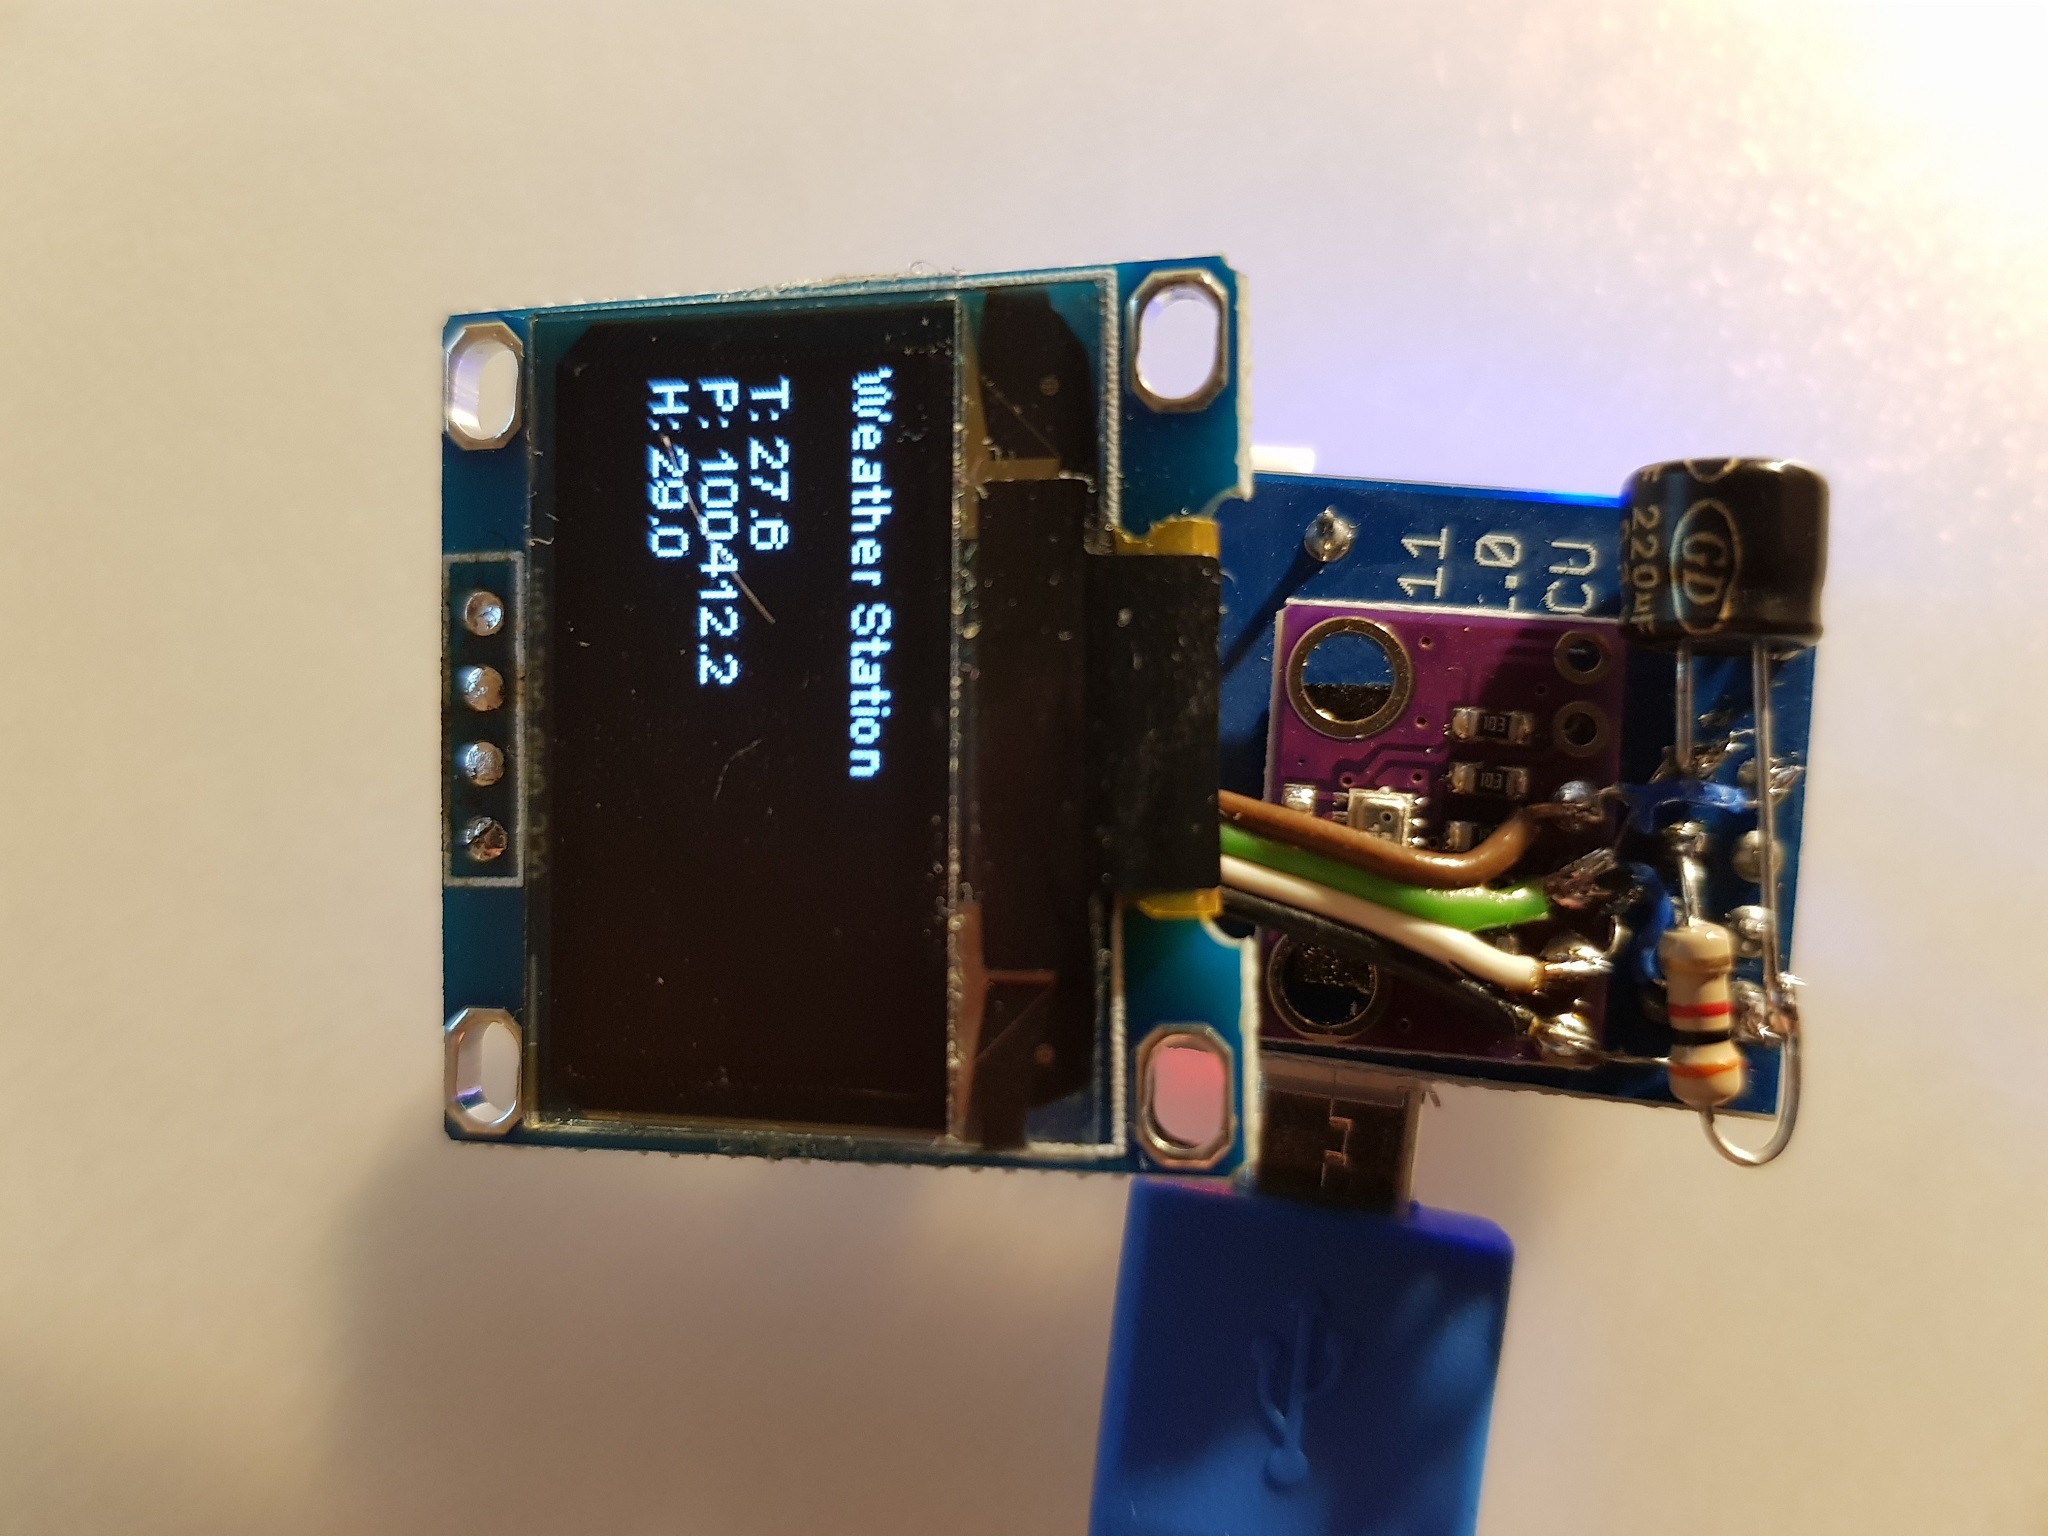
OLED
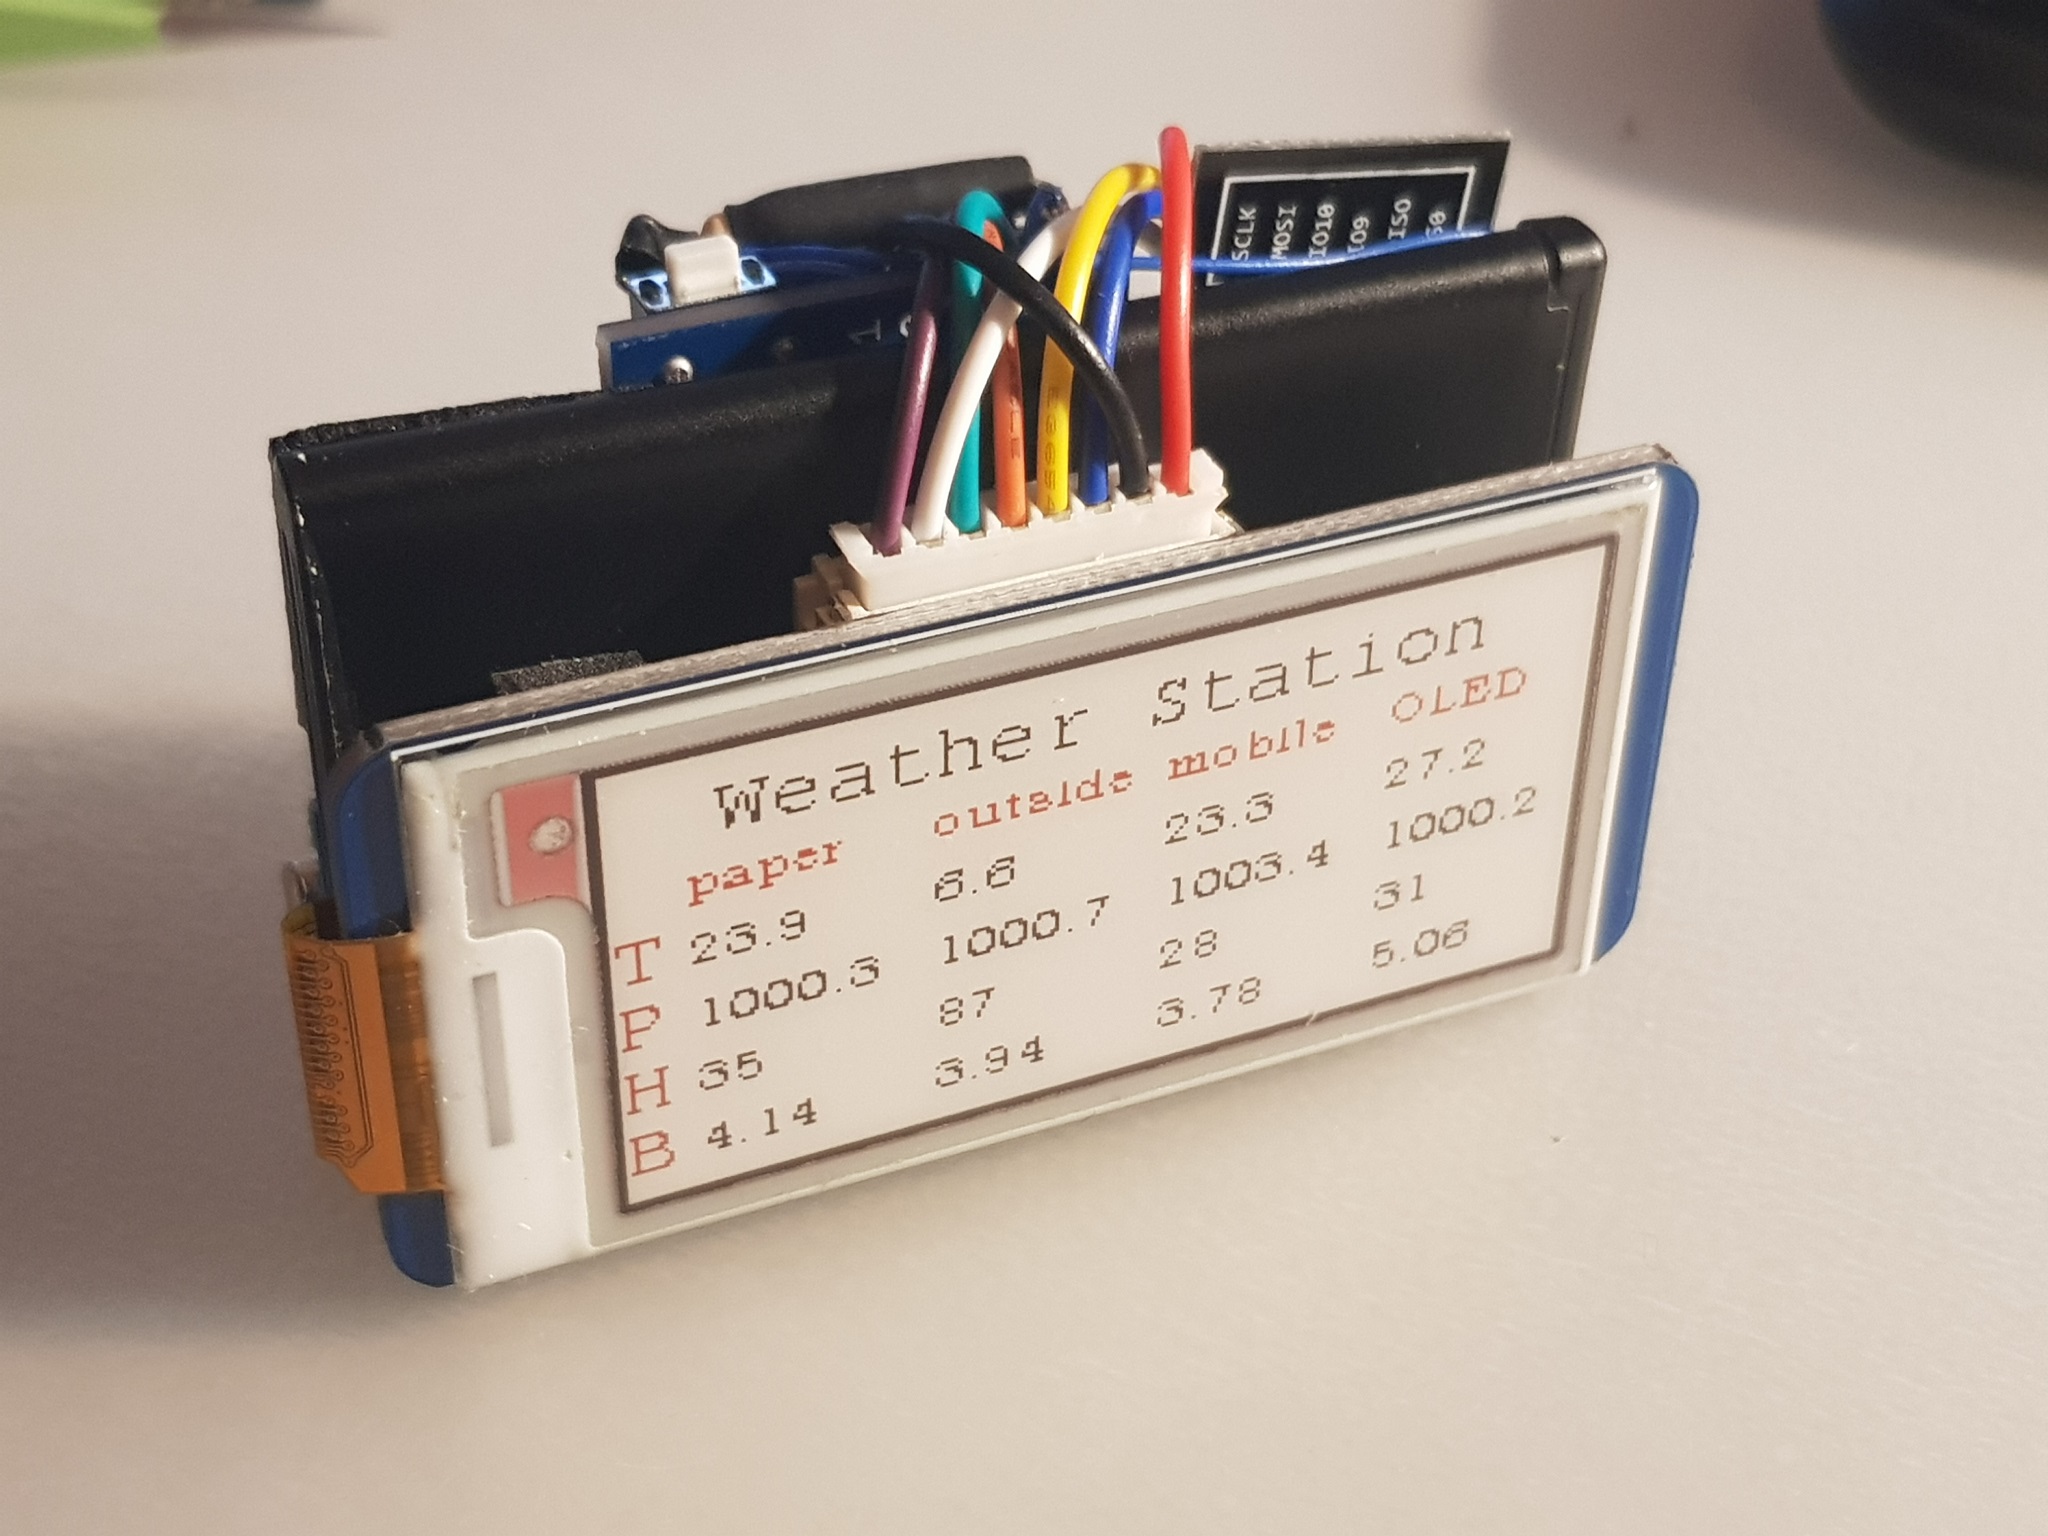
E-Paper
Construction
DHT11 and BMP280 modules are used in this station for prototypes. BME280 or even BME680 will be used in production. SSD1306 and 3 colour 2.13" E-Paper HAT are used for OLED and E-Paper variants respectively. For E-Paper prototype Wemos D1 mini was used and later replaced with standalone ESP-12F module.
For battery management I used a TP4050 micro-usb module with protection circuitry. If one has Lipo/LiIon batteries with protection in possession, then protection-less charging boards can be used.
I plan adding a 6V solar panel so I could start measuring outside temperature without worrying about the battery.
OLED variant in the above picture does not use any charging circuitry as it is meant for always-connected (or battery-pack) usage. However please note, that most battery packs will disconnect the battery from the station once it goes into deep sleep mode due to extremely low current consumption.
Cases for these can be 3D printed.
- Rx is SCL
- Tx is SDA
- GPIO 2 is 1-Wire interface for DHT11
- GPIO 13, 14, 15, 5, 12, 4 are for EPD signals: DIN, CLK, CS, DC, RST, BUSY respectively
- TOUT or ADC is for battery monitoring and connected to battery input via 1/10 voltage divider (ADC can measure up to 1.0V, so this scale factor is quite convenient)
- sourced on Ebay: DHT11 for ESP-1S module, BMP280 board, TP4050 lipo micro-usb charger board, SSD1306 and 2.13" RPI-Zero E-Paper HAT (Waveshare)
- LiIon Batteries from various dead cell phones and cheap Chinese video registrators
Cloning
Since I use git submodules (for EasyOTA), cloning must be done using --recurse-submodules option:
1git clone --recurse-submodules https://github.com/itohio/ESPWeather.git
2git checkout 10a7188545d1faf004c2990fb229bb47a6dc7dfc
Configuration
Please look at sample_wificonfig.h file, select relevant features, add default Wifi credentials, MQTT connection details and build after selecting appropriate board. Note, that wifi connection and MQTT are required if one wants to configure the station, e.g. changing the name or adding more access points.
Building
PlatformIO is used for this project. Just clone the project, import it into platformio, select board info and build. Flashing is also done this way. platformio.ini file contains some example upload_port values for OTA flashing. One can always use hostnames instead of ips. It's just that my bonjour service is confused because of different stations occupying the same hostname.
Battery monitoring
I use 100k trim pot directly across battery connector to the DH11 board, trim it to 1/10th of the battery voltage and solder the center tap to a TOUT pin right to the ESP8266 chip. I suggest flashing the ESP-1 module before soldering, so that the wire wouldn't be stressed to much. Discrete resistors for voltage divider can be seen in some the photos - this is because I ran out of trim pots:) And the dividing factor is not really precise, since I did not have 90k resistors and opted out for 2x51k + 10kx1k resistors. For the prototypes I am only interested in monitoring approximate voltage drop for the batteries and approximate point when DHT11 fails to provide meaningful readings. At about 2.80V of battery voltage DHT11 library returns nan. This voltage is even too low for ESP, but surprisingly it survives until 2.65(minus voltage drop across ldo).
Deep Sleep function
For waking up from Deep sleep GPIO 16 must be connected to RST. So more fine soldering skills are required in case of ESP-1. ESP-12 is more forgiving in that regard.
Reducing current consumption
I've measured 1.8ma current in deep sleep. That means that the station sleeps for 30 minutes with 1.8mA current consuming 1.8mAh(I assume it never goes away). During all the communication and measurements somewhere around 70-90 mA are flowing to the ESP. So let's say it's 75mA for 30s. That translates to 0.625mAh. Therefore 800mAh battery would last a long time (about 13 days). Sadly, the batteries I am using in the photos are pretty much dead and charge up to around 75-120mAh. Which lasted for about 40 hours which confirms current consumption measurements and rough calculations to a degree. That was with two LEDs being constantly lit and an onboard regulator. Which I am surprised by, by the way. One can always remove those buggers, but I figured that with solar panel the station would run almost indefinitely and would have plenty of run time for home usage with a 800mAh battery. By removing the blue LED current drops to ~400uA during deep sleep and the dead'est battery still runs for 4 days already at 3.75V.
Topics being published by the station
announce
Station will publish it's name to this topic once it connects to MQTT broker. Initially it will be a MAC address of the ESP. One can configure a different name by publishing to {station name}/name a new name which will be saved on the station.
{station name}/temperature
Temperature of the surroundings in deg. centigrade.
{station name}/pressure
Air pressure of the surroundings in milli Bar.
{station name}/humidity
Air relative humidity in percentage.
{station name}/battery
Battery voltage in volts.
Topics being subscribed by the station
{station name}/name
Publishing to this topic will change station name. Station name must not contain neither commas nor spaces as these symbols are reserved for E-Paper variant. One can specify a list of station names separated by a space or comma, so that measurement from those stations can be monitored. E.g. "paper OLED outside mobile" was used in the E-Paper variant shown in the photo. That means, that E-Paper variant's name was set to "paper" and three other stations were monitored: OLED, outside and mobile. Since each station published persistent telemetry messages, the latest data is being monitored and subsequently displayed on the E-Paper display.
{station name}/apadd
Publishing to this topic will add another Wifi Network. One must supply a space delimited ssid and password, e.g. ssid password. This will be saved to the station and it will try to connect to this and other saved APs on boot.
{station name}/apremove
Publishing to this topic will remove the ap. One must publish ssid of the network that one wishes to remove.
{station name}
This topic accepts following publishes:
SLEEP
Forces the station to sleep for preset time (around 30 minutes).
NOSLEEP
Disables sleeping of the stations. This does not percist after restart. Useful for OTA development/etc.
RESTART
Forces restart of the station.
PING
Forces to announce it's name on announce topic. Useful for station status monitoring.
Things to note
RX/TX pins
Due to pin count limitation on ESP-1 RX and TX pins are used for I2C bus. I2C stations seem to survive initial burst of boot info that is fed during bootup, but programming via serial while these pins are still connected to OLED/BMP280 is not advised. I've tried it, but ESP-12 module does not boot.
SPIFFS
Until now (20180216) ESP-01 with PUYA flash chips are not supported by the SPIFFS library (it can read uploaded, but not properly write files.). As a workaround one can publish config topics with persistent messages. E.g. setting name of the station. Setting up Wifi in this fashion isn't really useful for obvious reasons though.
BMP280
For some reason very first measurement is way too high (both temperature and pressure). I've tried several libraries with no luck. In fact Adafruit_BMP280 library gives way too high readings all the time. The one I'm using currently (BMP280) is simplistic and allows to set different oversampling values and gives the most accurate readings except for the very first. To remediate that I skip several first readings.
DHT11
Sometimes DHT11 will not read any data. And most of the time when the battery is almost depleted (<2.8V) there are no readings.